We may have been on vacation, but the garden was busy growing (so were the weeds!) and tonight we had our first fresh produce of the season. What was ready first? Well, the salad greens might've been ready, but they didn't come in tonight. Instead, we went for swiss chard and kohlrabi to enjoy with a pork steak.
I usually grow rhubarb chard and plant it from seed. You can also get plain green chard or rainbow chard (in which the stems are yellow, green, orange, or red). It tastes a lot like spinach but doesn't bolt (go to seed) nearly as early in the season. And you can cut it off just above the ground and it will grow a new batch of leaves that will take a couple of weeks or so to be ready to harvest. I cut about 1/6 of my little patch tonight.
As for kohlrabi, it's a member of the cabbage family. I planted four seedlings I bought at the garden center and a bunch more from seed. This one is from a seedling. These don't regrow but are worth the space anyway as they are slightly sweet and crunchy. Sort of like broccoli stems, but a nicer texture.
I trimmed off the kohlrabi leaves off over the compost pile.
Here I've washed the swiss chard and torn out the toughest (thickest) stems. It's a good idea to wash each leaf, turning over and checking the other side also. I once did a poor job of that and served Jim a large cooked slug attached to the back of a chard leaf. Not recommended.
While we waited for the chard and the pork steaks to cook, I peeled the kohlrabi and made it into sticks. We polished it off as an appy :) This is the pottery plate I purchased from Mussels and More on vacation.
Just to show you how much the swiss chard wilts while cooking.
Ah, supper. Serve the chard with a little butter, salt and pepper. Melt-in-your-mouth delicious.
Friday, June 26, 2009
Wednesday, June 24, 2009
Middle Mountain Mead
While we were on vacation last week, we paid a visit to Middle Mountain Mead on Hornby Island.
It crosses our mind that adding value to the honey our bees (and the additional hives we expect to buy) will produce might be a good idea. In our area there is no shortage of places one can purchase local honey. There may well be room in the market for more; I haven't yet done the research to make an educated decision. But right now we're looking at options, and opening a meadery is one such option.
We called ahead for an appointment because Hornby Island isn't into its summer schedule yet in June, and with two ferries to catch to get there, we didn't want to make the side trip if seeing the meadery wasn't a possibility. We were greeted by this young gentleman, whose name I forgot to get. Bad me.
Their tasting room is charming, and adorned with vast swaths of drying lavender.
The mead display area is simply made to suit the setting.
A large deck off the tasting room offers comfort and a spectacular view.
Our guide willingly showed us around, answered all our questions and encouraged me to take photos. Here he and Jim are discussing the fermentation process.
Then we wandered through their gardens for awhile. These aren't show gardens, but rather bee gardens. The beauty of mead, in my opinion, is that the bees make honey out of your flowers and fruit blossoms, then you can use the fruit itself, added to the honey, to make mead. Seems like a good use of resources to me!
Anyone know what this flower is (below)? See the busy bee? :) (You might need to click on the photo to enlarge it in order to see the bee.)
So the grounds below the meadery/tasting room are filled with ingredients for honey and ingredients for mead.
Here's the view they have to suffer through every day. Ah, bliss...
And, yes, we tucked a few bottles of various flavors into the car for special occasions over the next while. An Olde Mead, Cranberry Lavender Mead, Cyser (apple mead), and Green Tea Elixir.
Thursday, June 11, 2009
Rhubarb Melomel (Mead) -- Part 2
Last night we checked the specific gravity of the mead in the fermentation vessel. It was at 1.02, which is right where it should be.
I scooped out the majority of the rhubarb chunks, then we racked the mead. This basically means we siphoned it into a glass carboy, leaving behind the majority of the sediment and bits of fruit. You can see a vessel of amarone wine waiting for its turn to be racked.
Here's the carboy nearly full.
I forgot to take a photo once we'd put the fermentation lock on top. If you're not sure what that looks like, I found a photo here. You can see the mead is quite cloudy. Subsequent rackings should help with that, but if it doesn't clear, the taste isn't affected.
And I'm here to tell you that the sip of raw mead I had last night was quite good already, not nearly as astringent as the first taste of the plum wine we did in the fall of '07 at this stage. So far it is looking like this experiment will be a grand success :)
The Bees are Settling In :)
Here are the two hives on a sunny summer day. The hedge behind them is a caragana, which will help shelter them from the east wind (our nastiest weather is from the east). It also gives the bees a handy place to go should they decide to swarm.
Just to the south of the hives is a mass of wild roses, which they've definitely discovered!
Because we're leaving on vacation Friday morning, it was imperative for us to set up a self-watering system right away. It's not a good idea for them to be drinking out of the cow troughs! Here's what we've got:
The barrel is full of water with the tap set to a slight drip. An old hubcap is beneath it with a folded up towel in it. The saturated towel allows the bees to have something to walk on without drowning while they drink. Now our farm babysitter will only have to check the level of the barrel, which probably won't need topping off while we're gone.
The farm sitter will also want to keep an eye on the farm cats. Here's Mary, who was slightly tame when she arrived a month ago but has decided to raise her three kittens in the *wild*.
Monday, June 8, 2009
The Bees are Here :)
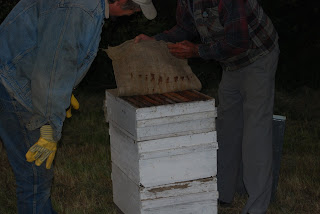
We have our own hives now! I'm so excited! Jim's been in touch with a local beekeeper for the last couple of weeks and arranged to purchase two hives from him. This evening was deemed "Bee Weather" (not too windy or rainy) and so the transfer took place. Here Jim and Lew are getting ready to off-load the hives.
Two guys can lift the hives quite readily.
Here Lew is introducing Jim to OUR bees :)
Then they off-loaded a stack of supers, which we'll add to the hives as needed for honey storage. We're headed off for a week's vacation this coming weekend (yeah I know, great timing!) and we'll leave a super on each hive before we go.
We've got a temporary water supply set up but will need to have a drip set up for them for while we're gone. Jim's folks can keep an eye, but the least they have to do (besides water the garden) the easier it will be for them.
Yay! We have bees!!
Monday, June 1, 2009
Herbs: Oregano
Oregano is a versatile plant and it grows like a weed. I'm certain there's an Oregano Master Mind somewhere with the desire to take over the world. I snip mine back all summer long and add it to just about anything that sounds good with fresh herbs. (I even tried oregano tea once, but we won't repeat that one...)
But it's nice to have oregano year round, so this weekend I harvested some to dehydrate for winter use. Jim bought me a Berron Food Dehydrator in 1985 when all our friends were purchasing their first microwaves. It took us another four years to get to the microwave, and meanwhile we'd dried a lot of things in the dehydrator. Sadly, they don't seem to have a website, though I believe they're still in business in BC's Greater Vancouver area.
Anyway. Oregano.
Because it's in a clean area of my yard, I just cut down a clump, pulled the bits of grass out of it, and spread the stalks out on dehydrator trays.
Turned it to 95 degrees, the recommended temperature for herbs, and left it for about 36 hours. When the leaves were crumbly to touch, I pulled out the racks.
I just picked up a few stems at a time and ran my fingers down to dislodge the dried leaves. I'll put these in a canning jar with a LABELED lid to use all winter long, but for now I'll keep going outside to snip fresh for salads, stir-fries, and focaccia bread.
Subscribe to:
Posts (Atom)